Track Your Order

Does the concealer go first, or the foundation? Does the blush go first, or the bronzer? Can I apply the eyeliner over the eyeshadow, or will it ruin the look? Can I use both setting powder and setting spray?
These are some of the most frequently asked questions about makeup steps we’ve received over the years. But let’s face it, everybody starts somewhere, right? While these makeup steps are like textbook knowledge for pros & makeup enthusiasts, many are still just starting their makeup journey. And they’re bound to have questions about the correct order of basic makeup steps to create flawless looks every time. While we’ve always said that there’s no right or wrong when it comes to makeup because it’s about self-expression, when it comes to makeup steps, there’s a fool-proof pattern that you can never go wrong with. Consider these as the rules of makeup.
step-by-step makeup guide to ace your look every time
Step 1: Skin Prep
This is the most basic makeup step that isn’t even about makeup! Start with a freshly cleansed face and follow it up with a hydrating face serum or one that meets your skin’s needs. Next, go in with a moisturiser and use a lightweight, SPF 50 sunscreen during the day. Make sure to allow time for the product to sink in completely to avoid pilling.
Step 2: Primer
We’ve said it before, and we’ll keep saying it because missing out on this makeup step is non-negotiable. A good primer can help your makeup from smudging or budging for long hours. Choose one according to your skin's needs to get the best results from your primer. For example, if you have redness, choose a colour correcting primer; if you have oily skin or enlarged pores, use a mattifying or blurring primer; and if you have dry skin, use a hydrating or illuminating one. Use a coin-sized amount for your full face, and apply it evenly.
Step 3: Foundation & Concealer

Now onto the base - you can mix it up in this makeup step. Some prefer to go with foundation first, then concealer, while some prefer the opposite. If you want to even out your complexion first, then go for foundation first. If you want to focus on areas of concern before that, then go for concealer first. But most importantly, blend it well to get rid of any patches or harsh lines using the Simply Nam Pro Microfibre Makeup Sponge to get a flawless, airbrushed finish.
Pro Tip - You can even use a colour corrector on concern areas before going in with the rest of your base products.
Step 4: Bronzer & Blush

Time to add some colour & structure to your face! Use a bronzer to add warmth & structure to your face and give it a natural sun-kissed glow. Follow it up with a blush; lightly apply your blush to your cheekbones and gradually move toward the temples to get a more snatched look to your face. One thing to keep in mind in this makeup step is to use the same formula for both the bronzer and blush.
Pro Tip - If you’re using a cream bronzer, then use a blush from the Simply Nam Velvet Cream Magic Blush range; and if you’re using a powder one, then use the Simply Nam Radiant Powder Magic Blush.
Step 5: Brows
Now that your base is done, fix & tame your brows. Brows frame your face & give it structure, and this makeup step helps to accentuate that. First, start by removing any foundation or other product from your brows, then comb them. Use a brow gel to fix them and keep them in place for long hours. You can even fill them using a brow pencil or a precision pen to get clear, hair-like strokes. To get a natural look, only fill in the gaps in your brows.
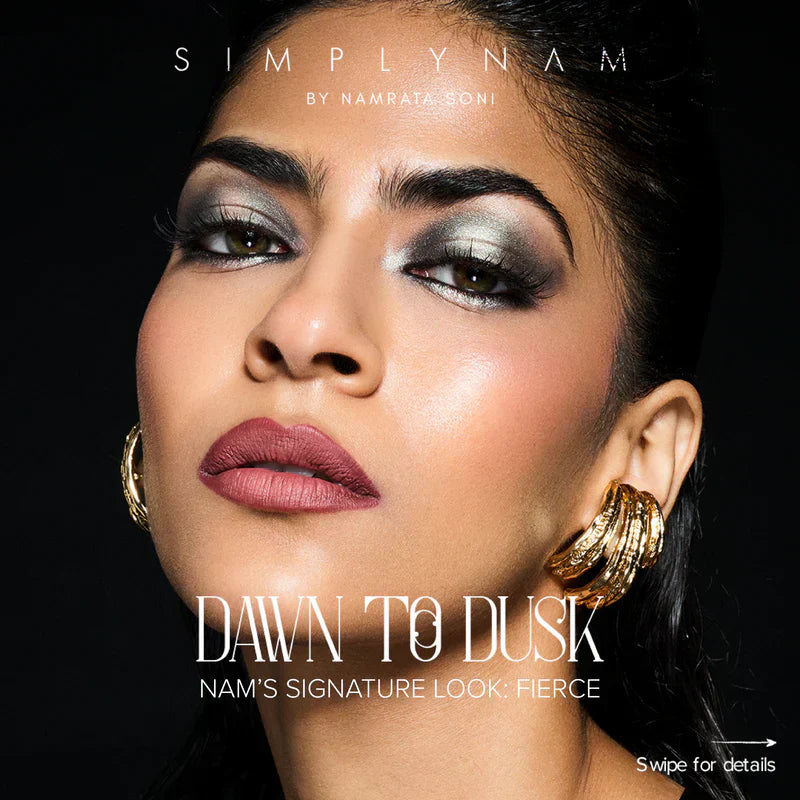
Step 6: Eyeshadow

Next up in this step-by-step makeup guide is eyeshadow. Whether you want a subtle look for a daytime outing or want to go all out with a bold eye look for a night out in the town, the Simply Nam Dawn to Dusk Eyeshadow Palette has it all for you. From matte to metallic, this eyeshadow palette is as versatile as it gets. Once you’ve got this, all you need to do is get experimenting with all those eye looks you’ve been adding to your pinterest boards.
Pro Tip - If you have pigmentation or darkness around the eyes, we recommend going in with a colour corrector or concealer over the lids to get an even tone before applying the eyeshadow.
Step 7: Eyeliner

No eye look is complete without this! This basic makeup step is what helps to take your eye look to a whole different level to make your eyes pop in any look. You can go with the classic black feline flick, keep it subtle with a brown, or get a little adventurous and try a blue - either way, Simply Nam The Ultimate Kajal range has it all for you. These one-stroke wonders of a kajal range offer a sweat-proof & water-resistant formula, intense colour payoff, and it glides oh-so-smoothly for the perfect application every time.
Step 8: Mascara

Nothing better than long, voluminous lashes to complete your eye look. If you’re looking to accentuate your lashes and get on the ‘next-level fluttery’ look, then use a strip of Simply Nam Flawless Eyelashes. With 3 options to choose from, pick the one that best fits your look.
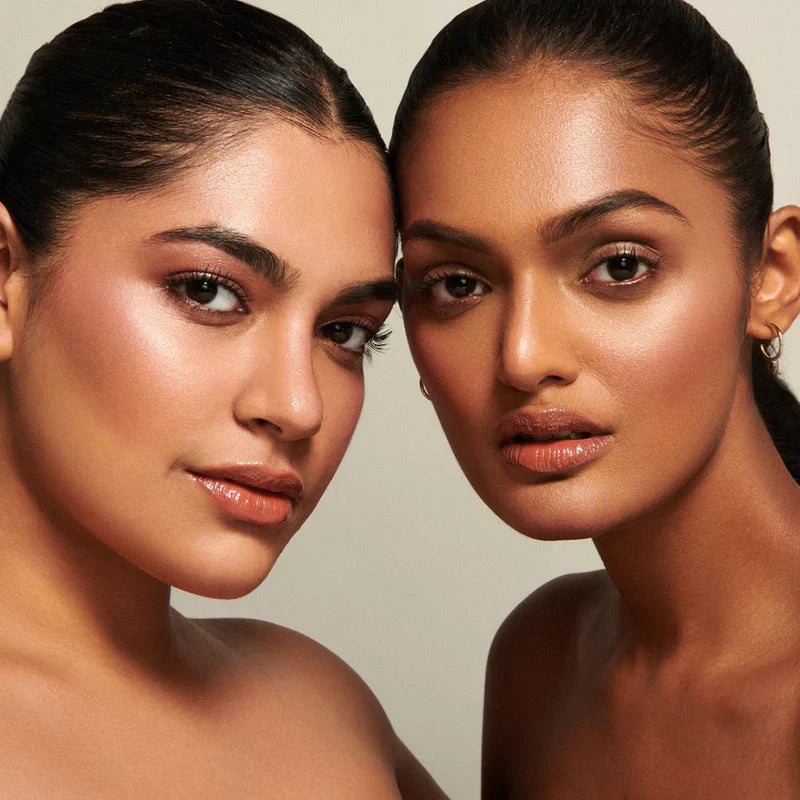
Step 9: Highlighter
Whether it’s a subtle look or an OTT one, just a touch of highlighter on the high points of your face can make all the difference in the world! Dab a shade from the Simply Nam Cosmic Glow Highlighter Duo on the high points of your face, like the brow bone, cheekbones, bridge of the nose, and chin. Lightweight & long-lasting, this highlighter duo offers 2 beautiful shades to elevate your makeup look with that lit-from-within glow!
Pro Tip - If you want to extend this makeup step beyond your face, then you can use the Simply Nam Pixie Dust Multi-Use Glitter Glow on your shoulders and collarbones too.
Step 10: Lipstick
We would call this the most fun part of this whole step-by-step makeup guide! Accentuating your pout has got to be the most fun part. You can either pick one shade and go with it, mix more than one shade to create a unique colour to complement your look, go glossy or matte, the options can seem endless, especially when you’ve got your hands on the Simply Nam Lip Range. From bright red to the perfect nude, pretty pinks and peachy hues, this range has got it all for your unique Indian skin tone. This range will surely feel like an invitation to your little swatch party!
Step 11: Setting Powder & Spray
Yes, you can use both together! While a setting powder is more beneficial for oily skin types to control unnecessary shine, they both work just as efficiently to keep your makeup in place for long hours. Start this last makeup step by applying powder to areas that tend to get more oily or are prone to creasing. Wait till the powder has settled and brush off the excess to finally use the setting spray for the final touch.